Setup V2Ray VPN Server 101 | on Hax.co.id VPS, totally FREE
bash <(curl -L https://github.com/crazypeace/V2ray_VLESS_WebSocket_TLS_CaddyV2/raw/main/install.sh)
bash <(curl -L git.io/warp.sh) 4
Prerequisites
You should have a telegram account.
---------------------
Installation
1. Create Hax.co.id VPS
Visit https://hax.co.id/, Click the menu button "三" - Register
Or visit https://hax.co.id/register directly
Enter your account, password, pass the robot test.
Click Submit.
Data Center - No matter, just don't choose OPENVZ.
Operating System - Debian11
Password - set your root password
VPS Purpose - Whatever
Check everything, pass the robot test.
Click CREATE VPS
2. Create a DNS pointing (domain)
Click 'DNS Pointing CF'
Or visit https://hax.co.id/dns-pointing directly.
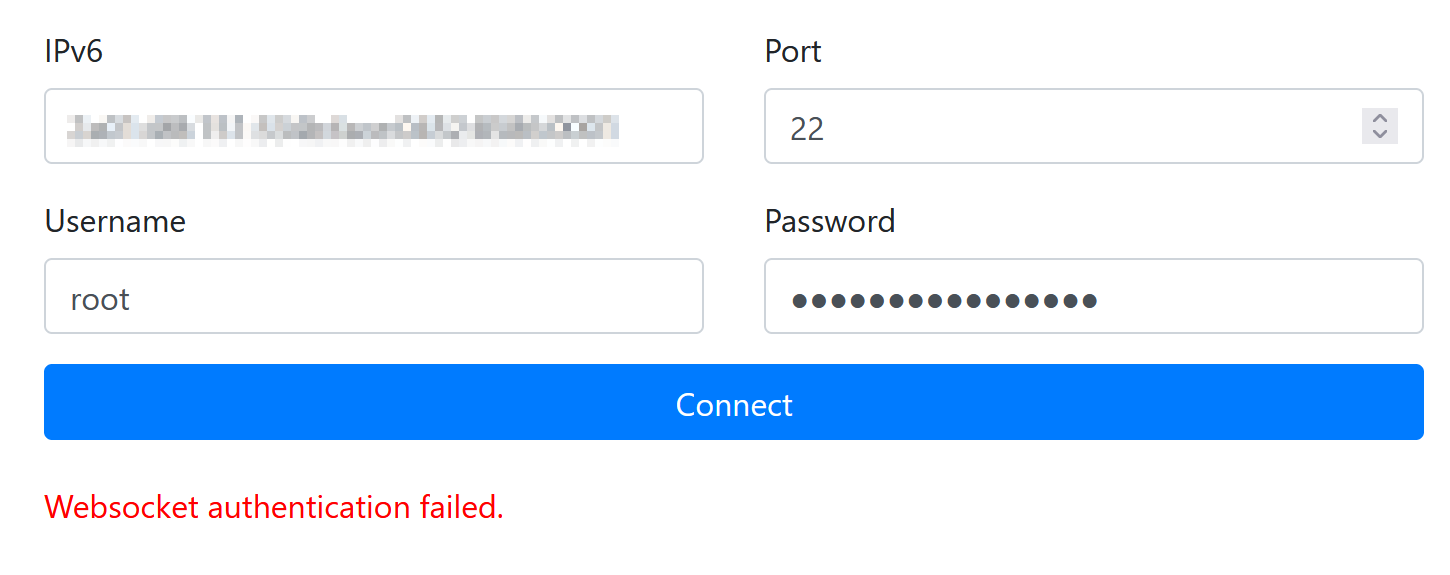
3. Login into your VPS via SSH
4. Setup V2Ray VPN Server
apt update
apt install -y curl
bash <(curl -L https://github.com/crazypeace/V2ray_VLESS_WebSocket_TLS_CaddyV2/raw/main/install.sh)
5. Login into your VPS via FTP
6. Setup CDN
Till now, our V2Ray VPN server can only accept IPv6 inbound. We will use Cloudflare Proxy (CDN) to transport the traffic pointing our domain from IPv4 to IPv6 (our VPS).
Delete the DNS which we just build with 'CF Proxy - No' setting.
---------------------
Troubleshoot
V2Ray WebSocket+TLS Mode Troubleshooting | First-Time Setup Failed
V2Ray WebSocket+TLS Mode Process of Connection and Troubleshooting
---------------------
PS
If you create your VPS is located on US-1. You may meet a problem that when your script access github.com it will get stuck.
visit https://hax.co.id/vps-info to check your VPS's location.
You need to run WARP script to setup an IPv4 outbound first.
bash <(curl -L https://raw.githubusercontents.com/crazypeace/warp.sh/main/warp.sh) 4
Then set IPv4 has higher priority.
bash <(curl -L https://raw.githubusercontents.com/crazypeace/warp.sh/main/ipv4v6.sh) 4
Then you can run any GitHub script.
At the end of my V2Ray script, when script ask you to setup WARP, press Ctrl+C to terminate the script.
---------------------
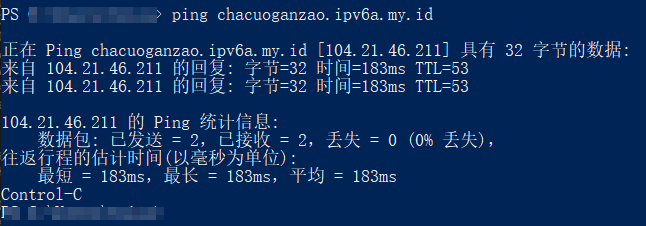
If after a long time, you still can't get an IPv4 result when you ping your domain, you can use this script to check if the DNS is already effective on Cloudflare server. (change the blue part as your domain)
curl -sH 'accept: application/dns-json' "https://cloudflare-dns.com/dns-query?name=chacuoganzao.ipv6a.my.id&type=A" | jq -r '.Answer[0].data'
If you can ping that IPv4 address, then you can add it into your hosts file.
Or you can use https://github.com/XIU2/CloudflareSpeedTest to pick an Cloudflare CDN IP address for you, and add it into your hosts file. (change all the blue part as yours)
104.21.46.211 chacuoganzao.ipv6a.my.id
---------------------
Example log, please compare to yours
---------------------
[BEGIN] 2022/3/30 23:01:41Connecting to 91.134.238.133:4487...Connection established.To escape to local shell, press 'Ctrl+Alt+]'.Linux 391932510hax.localdomain 5.10.0-8-amd64 #1 SMP Debian 5.10.46-4 (2021-08-03) x86_64The programs included with the Debian GNU/Linux system are free software;the exact distribution terms for each program are described in theindividual files in /usr/share/doc/*/copyright.Debian GNU/Linux comes with ABSOLUTELY NO WARRANTY, to the extentpermitted by applicable law.Last login: Wed Mar 30 10:38:54 2022 from 2101:41d0:8:824f:22:d9e4:90a3:1
root@391932510hax:~# apt updateapt install -y curlroot@391932510hax:~# apt updateapt install -y curlbash <(curl -L https://github.com/crazypeace/V2ray_VLESS_WebSocket_TLS_CaddyV2/raw/main/install.sh)Hit:1 http://deb.debian.org/debian bullseye InReleaseHit:2 http://security.debian.org/debian-security bullseye-security InReleaseGet:3 http://deb.debian.org/debian bullseye-updates InRelease [39.4 kB]Get:4 https://dl.cloudsmith.io/public/caddy/stable/deb/debian any-version InRelease [7,491 B]Fetched 46.8 kB in 2s (30.9 kB/s)Reading package lists... DoneBuilding dependency tree... DoneReading state information... Done79 packages can be upgraded. Run 'apt list --upgradable' to see them.Reading package lists... DoneBuilding dependency tree... DoneReading state information... Donecurl is already the newest version (7.74.0-1.3+deb11u1).0 upgraded, 0 newly installed, 0 to remove and 79 not upgraded.% Total % Received % Xferd Average Speed Time Time Time CurrentDload Upload Total Spent Left Speed100 160 100 160 0 0 124 0 0:00:01 0:00:01 --:--:-- 124此脚本仅兼容于Debian 10+系统. 如果你的系统不符合,请Ctrl+C退出脚本可以去 https://github.com/crazypeace/V2ray_VLESS_WebSocket_TLS_CaddyV2 查看脚本整体思路和关键命令, 以便针对你自己的系统做出调整.----------------------------------------------------------------100 13292 100 13292 0 0 9036 0 0:00:01 0:00:01 --:--:-- 9036按 Enter 回车键 继续....或按 Ctrl + C 取消.Hit:1 http://security.debian.org/debian-security bullseye-security InReleaseHit:2 http://deb.debian.org/debian bullseye InReleaseHit:3 http://deb.debian.org/debian bullseye-updates InReleaseGet:4 https://dl.cloudsmith.io/public/caddy/stable/deb/debian any-version InRelease [7,491 B]Fetched 7,491 B in 2s (4,232 B/s)Reading package lists... DoneBuilding dependency tree... DoneReading state information... Done79 packages can be upgraded. Run 'apt list --upgradable' to see them.Reading package lists... DoneBuilding dependency tree... DoneReading state information... Donebash is already the newest version (5.1-2+b3).curl is already the newest version (7.74.0-1.3+deb11u1).jq is already the newest version (1.6-2.1).sudo is already the newest version (1.9.5p2-3).0 upgraded, 0 newly installed, 0 to remove and 79 not upgraded.安装V2ray最新版本----------------------------------------------------------------% Total % Received % Xferd Average Speed Time Time Time CurrentDload Upload Total Spent Left Speed100 21647 100 21647 0 0 81686 0 --:--:-- --:--:-- --:--:-- 81686info: No new version. The current version of V2Ray is v4.44.0 .安装CaddyV2最新版本----------------------------------------------------------------sudo: unable to resolve host 391932510hax.localdomain: Name or service not knownReading package lists... DoneBuilding dependency tree... DoneReading state information... Doneapt-transport-https is already the newest version (2.2.4).debian-archive-keyring is already the newest version (2021.1.1).debian-keyring is already the newest version (2021.07.26).0 upgraded, 0 newly installed, 0 to remove and 79 not upgraded.sudo: unable to resolve host 391932510hax.localdomain: Name or service not knownWarning: apt-key is deprecated. Manage keyring files in trusted.gpg.d instead (see apt-key(8)).OKsudo: unable to resolve host 391932511hax.localdomain: Name or service not known# Source: Caddy# Site: https://github.com/caddyserver/caddy# Repository: Caddy / stable# Description: Fast, multi-platform web server with automatic HTTPSdeb https://dl.cloudsmith.io/public/caddy/stable/deb/debian any-version maindeb-src https://dl.cloudsmith.io/public/caddy/stable/deb/debian any-version mainsudo: unable to resolve host 391932511hax.localdomain: Name or service not knownHit:1 http://security.debian.org/debian-security bullseye-security InReleaseHit:2 http://deb.debian.org/debian bullseye InReleaseHit:3 http://deb.debian.org/debian bullseye-updates InReleaseGet:4 https://dl.cloudsmith.io/public/caddy/stable/deb/debian any-version InRelease [7,491 B]Fetched 7,491 B in 2s (4,422 B/s)Reading package lists... DoneBuilding dependency tree... DoneReading state information... Done79 packages can be upgraded. Run 'apt list --upgradable' to see them.sudo: unable to resolve host 391932510hax.localdomain: Name or service not knownReading package lists... DoneBuilding dependency tree... DoneReading state information... Donecaddy is already the newest version (2.4.6).0 upgraded, 0 newly installed, 0 to remove and 79 not upgraded.
打开BBR----------------------------------------------------------------配置 VLESS_WebSocket_TLS 模式----------------------------------------------------------------请输入 V2RayID(默认ID: 2c526f65-2f9a-4354-ae34-2135e19b2e41):V2RayID = 2c526f65-2f9a-4354-ae34-2135e19b2e41----------------------------------------------------------------请输入 V2Ray 端口 [1-65535], 不能选择 80 或 443 端口(默认端口: 64994):V2Ray 端口 = 64994----------------------------------------------------------------请输入一个 正确的域名, 一定一定一定要正确, 不! 能! 出! 错!(例如: zelikk.blogspot.com): chacuoganzao.ipv6a.my.id你的域名 = chacuoganzao.ipv6a.my.id----------------------------------------------------------------如果你的小鸡是双栈(同时有IPv4和IPv6的IP),请选择你把v2ray搭在哪个'网口'上如果你不懂这段话是什么意思, 请直接回车Input 4 for IPv4, 6 for IPv6:请将 chacuoganzao.ipv6a.my.id 解析到: 2101:4f8:151:334b:face:452:8586:1Resolve chacuoganzao.ipv6a.my.id to: 2101:4f8:151:334b:face:452:8586:1请将 chacuoganzao.ipv6a.my.id 解析到: 2101:4f8:151:334b:face:452:8586:1----------------------------------------------------------------(是否已经正确解析: [Y]): Is resolution correct?y域名解析 = 我确定已经有解析了----------------------------------------------------------------请输入想要 用来分流的路径 , 例如 /v2raypath , 那么只需要输入 v2raypath 即可(默认: [2135e19b2e41]):分流的路径 = /2135e19b2e41----------------------------------------------------------------请输入 一个正确的 网址 用来作为 网站的伪装 , 例如 https://zelikk.blogspot.com(默认: [https://zelikk.blogspot.com]):伪装的网址 = https://zelikk.blogspot.com----------------------------------------------------------------配置 /usr/local/etc/v2ray/config.json----------------------------------------------------------------配置 /etc/caddy/Caddyfile----------------------------------------------------------------重启 V2Ray----------------------------------------------------------------重启 CaddyV2-------------------------------------------------------------------------- V2Ray 配置信息 ----------------提示..这是 VLESS 服务器配置---地址 (Address) = chacuoganzao.ipv6a.my.id端口 (Port) = 443用户ID (User ID / UUID) = 2c526f65-2f9a-4354-ae34-2135e19b2e41流控 (Flow) = 空加密 (Encryption) = none传输协议 (Network) = ws伪装类型 (header type) = none伪装域名 (host) = chacuoganzao.ipv6a.my.id路径 (path) = /2135e19b2e41底层传输安全 (TLS) = tls---------- V2Ray VLESS URL ----------vless://2c526f65-2f9a-4354-ae34-2135e19b2e41@chacuoganzao.ipv6a.my.id:443?encryption=none&security=tls&type=ws&host=chacuoganzao.ipv6a.my.id&path=2135e19b2e41#VLESS_WSS_chacuoganzao.ipv6a.my.id---------- END -------------这是一个 IPv6 小鸡,用 WARP 创建 IPv4----------------------------------------------------------------按 Enter 回车键 继续....或按 Ctrl + C 取消.__ ___ ____ ____ ___ _ _ _\ \ / / \ | _ \| _ \ |_ _|_ __ ___| |_ __ _| | | ___ _ __\ \ /\ / / _ \ | |_) | |_) | | || '_ \/ __| __/ _` | | |/ _ \ '__|\ V V / ___ \| _ <| __/ | || | | \__ \ || (_| | | | __/ |\_/\_/_/ \_\_| \_\_| |___|_| |_|___/\__\__,_|_|_|\___|_|Copyright (C) P3TERX.COM | https://github.com/P3TERX/warp.shSystem Information---------------------------------------------------Operating System: Debian GNU/Linux 11 (bullseye)Linux Kernel: 5.10.0-8-amd64Architecture: x86_64Virtualization: kvm---------------------------------------------------[INFO] WireGuard is installed and running.[INFO] Disabling WireGuard...Removed /etc/systemd/system/multi-user.target.wants/wg-quick@wgcf.service.[INFO] WireGuard has been disabled.[INFO] Getting the network interface IPv6 address...[INFO] IPv6 Address: 2a01:4f8:151:334b:face:452:8586:1[INFO] Getting the best MTU value for WireGuard...[INFO] WireGuard MTU: 1400[INFO] WireGuard profile (/etc/wireguard/wgcf.conf) generation in progress...=================================================================================================================================================================================================================# Generated by P3TERX/warp.sh# Visit https://github.com/P3TERX/warp.sh for more information[Interface]PrivateKey = cL6+xlZD4aAaAhn3lEDOGXEeVI9Hbg8pgrZovj88u0I=Address = 172.16.0.2/32,fd01:5ca1:ab1e:864c:cd2c:a168:ad6a:a672/128DNS = 2101:4860:4860::8888,2001:4860:4860::8844,8.8.8.8,8.8.4.4MTU = 1400[Peer]PublicKey = bmXOC+F1FxEMF9dyiK2H5/1SUtzH0JuVo51h2wPfgyo=AllowedIPs = 0.0.0.0/0Endpoint = [2606:4700:d0::a29f:c001]:2408=================================================================================================================================================================================================================[INFO] Starting WireGuard...Created symlink /etc/systemd/system/multi-user.target.wants/wg-quick@wgcf.service → /lib/systemd/system/wg-quick@.service.[INFO] WireGuard is running.[INFO] Status check in progress...----------------------------WireGuard : RunningIPv4 Network : WARPIPv6 Network : Normal----------------------------[INFO] Done.重启 V2Ray----------------------------------------------------------------重启 CaddyV2----------------------------------------------------------------[END] 2022/3/30 23:11:36


评论
发表评论