博文

目前显示的是标签为“ghproxy”的博文

极简 GitHub Porxy 支持GitHub脚本的无限嵌套调用

图片
前言 当我看到这个DD系统的项目时 https://github.com/bin456789/reinstall 我被它的安装命令吸引了. curl -O https://raw.githubusercontent.com/bin456789/reinstall/main/reinstall.sh || wget -O ${_##*/} $_ 找GPT解析了一下原理, 是为了考虑到有些linux系统默认有wget,有些默认有curl . 我准备把 我的极简一键脚本 的安装方式都改成这样 . curl -LO https://github.com/crazypeace/xray-vless-reality/raw/main/install.sh || wget -O ${_##*/}$_ && bash install.sh 4 8443 然后在脚本的一开始, 安装 curl 和 wget. apt-get -y install curl wget -qq 我倾向于显示错误内容, 这样在小白反馈问题的时候, 直接发截图或日志就行了. 所以curl和wget没有加静默参数. 复杂的脚本命令, 在结合我的ghproxy时, 如果要实现嵌套github脚本调用, 现有的方案会比较难处理. 我准备改用 WJQSERVER-ghproxy 的思路. 在ghproxy 本身的处理过程中, 针对  .sh 的资源, 全量查找替换, 把访问github资源的链接, 都再套一次自己 ghproxy. 然后再返回. 新建一个 github proxy 项目名 ghproxy 不影响 原来使用 gh-proxy 的用户. worker.js 我想了一下,  基于 cloudflare 的 woker, 开发 一个专门 反向代理  github 的工具 1. 本代理 接收的 path部分 应该是一个 http:// 或者 https:// 2. 如果 path部分 不是 http:// 或者 https:// 开头 那么加上 http:// 或者 https://  3. 判断 本代理 接收的 链接 是否 github 判断方法为: 链接 的域名部分 应该是 git 开头的主域名 如  github.com...

把我的 ghproxy 以python的方式运行一个后端

图片
需求 一直以来, 我都是教别人用嫖 cloudflare 的 worker 的方式来搭 ghproxy, 如果被封, 相当于封域名. 今天又遇到一个人求助, 而我自己的ghproxy域名已经被封完了. 所以我想, 用python的方式运行一个后端吧. 这样, 有些人有VPS资源的, 可以自己马上跑一个后端出来. 本来, 我fork的原项目就是支持python的, 我只要针对自己添加的嵌套脚本调用 github 资源的逻辑 做一些更新就好. 现在gpt的力量很强大了. Github 项目已提交更新 https://github.com/crazypeace/gh-proxy 以下为使用教程. python 环境 apt install -y python3-pip pip3 install flask requests --break-system-packages 下载 ghproxy 文件 wget https://github.com/crazypeace/gh-proxy/raw/refs/heads/master/app/main.py wget https://github.com/crazypeace/gh-proxy/raw/refs/heads/master/app/uwsgi.ini 修改 main.py 在本教程中, 用稍微"危险"一点的方式, 快速地实现基本功能. 所以监听IP设置为 0.0.0.0 即, 向外部监听. 端口为了不与常见端口冲突, 修改为 8000 . 启动 ghproxy python3 main.py 启动成功后, ghproxy后端地址为 http://你的VPS的IP: 8000 / * 注意,  开头是 http 没有 s 8000 是你修改 main.py 时设置的端口号 末尾有 / ** 注意, 这个方式是在当前终端环境下运行 ghproxy. 不能 Ctrl+C 中止. 不能断开ssh连接. 我写本教程的本意就是让你要用的时候才开, 用完就关. 使用方式 浏览器打开一个ghproxy web页面工具, 比如  https://crazypeace.github.io/gh-proxy/ 把后端的地址填写到这个位置 然后按你原来就会的方式使用这个前端页面来 转换一键脚本命令. 特别的,...

GitHub Proxy 更新 支持在一行内 wget 下载再执行的形式

图片
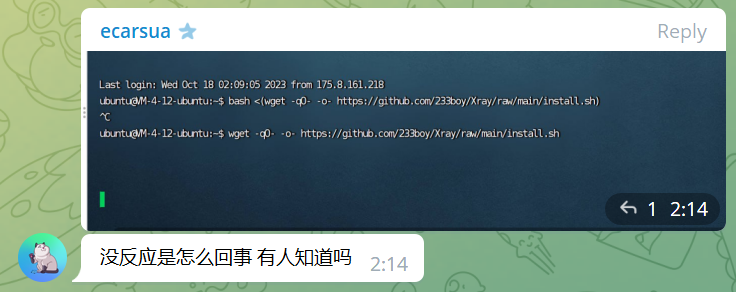
现象 一直以来, 在各种地方不断地看到在不同的环境下跑Github脚本不成功的网友. 有些一键脚本的作者为了美观( 装B )会带上不显示错误信息的参数, 比如 wget -q 和 curl -s 这样, 如果出错就一点显示都没有. 对不懂的小白来说, 连用微信扫一扫翻译错误信息的机会都没有. 比如, 这位仁兄

GitHub Proxy 跑在 Replit 上面, wget 获取是乱码, 使用 --compression=auto 参数解决问题

图片
现象 GitHub Proxy 跑在  Replit  上面, wget 获取是乱码, curl 获取正常 在replit上搭建 GitHub Proxy 的教程看以前写的 使用方法: wget -O- https://ghproxy.crazypeace.repl.co/https://git.io/v2ray.sh 效果是乱码 同样的网址, 用curl获取就是正常的. curl -L https://ghproxy.crazypeace.repl.co/https://git.io/v2ray.sh 同样的Github Proxy项目, 搭在Cloudflare worker上面, 用wget获取也是正常的. wget -O- https://ghproxy.crazypeace.workers.dev/https://git.io/v2ray.sh

简化操作 生成调用github代理的命令 解决使用github脚本时遇到的各种访问github出错的问题

图片
之前写过一篇 用github代理来解决使用github脚本时遇到的各种访问github出错的问题 . 但是方法看起来比较复杂, 可能除了我没人愿意这么用.  所以做成了一个页面, 可以由 cloudflare 的 worker 调用. 这样使用者就只剩下鼠标点点点了. 演示视频:

sed不支持非贪婪匹配 改用perl

问题 之前   Free.vps.vc 访问GitHub资源出错 用GithubProxy代理 用sed修改脚本内容 实践: bash <(curl -L  https://github.crazypeace.workers.dev/ https://github.com/crazypeace/v2ray_wss/raw/main/install.sh   | sed -E "$(curl -L  https://github.crazypeace.workers.dev/ https://github.com/crazypeace/gh-proxy/raw/master/sed-E-para )" ) 发现这个处理方法并不完美。 用grep github把涉及修改的地方输出一下。 curl -L  https://github.crazypeace.workers.dev/ https://github.com/crazypeace/v2ray_wss/raw/main/install.sh   | sed -E "$(curl -L  https://github.crazypeace.workers.dev/ https://github.com/crazypeace/gh-proxy/raw/master/sed-E-para )" | grep github 发现,.sh 的部分, bash <(curl -L https://github.crazypeace.workers.dev/ https://raw.githubusercontent.com/v2fly/fhs-install-v2ray/master/install-release.sh | sed -E "$(curl -L https://github.com/crazypeace/gh-proxy/raw/master/sed-E-para)" ) --version 4.45.2 只在前面加了 github proxy,后面调用 GitHub 资源的部分并没有处理。 分析 查了一下资料发现,sed只有贪婪匹配,所以改用 perl 实操 perl用来做正则替换的参数为 -pe,里面同样支持sed语...

GitHub Proxy 支持 api.github.com

图片
在使用GitHub Proxy代理 warp 脚本时,发现在调用api.github.com时报错。 经查, gh-proxy 没有加入对api.github.com的支持 https://github.com/hunshcn/gh-proxy/issues/44 那么就自己加一下吧。 修改内容很简单,前面部分,过滤格式增加一行 const exp7 = /^(?:https?:\/\/)?api\.github\.com\/.+?\/.+?\/.*$/i 后面部分,判断格式的地方加一个 || path.search(exp7) === 0  ====== 完 Github:  https://github.com/crazypeace/gh-proxy ====== 实例 bash <(curl  https://github.crazypeace.workers.dev/ https://raw.githubusercontent.com/P3TERX/warp.sh/main/warp.sh   | perl -pe "$(curl -L  https://github.crazypeace.workers.dev/ https://github.com/crazypeace/gh-proxy/raw/master/perl-pe-para )" ) 4

在IPv6 only Free.VPS.vc VPS访问GitHub一键脚本失败的时候,用GitHub Proxy解决问题

图片
原理: Free.vps.vc 访问GitHub资源出错 用GithubProxy代理 用sed修改脚本内容 sed不支持非贪婪匹配 改用perl 网页工具 https://crazypeace.github.io/gh-proxy/ https://ghproxy.crazypeace.workers.dev/ 使用演示 实例: 极简一键脚本 搭V2Ray 修改前 bash <(curl -L  https://github.com/crazypeace/v2ray_wss/raw/main/install.sh ) 修改后 bash <(curl -L  https://ghproxy.crazypeace.workers.dev/ https://github.com/crazypeace/v2ray_wss/raw/main/install.sh   | perl -pe "$(curl -L  https://ghproxy.crazypeace.workers.dev/ https://github.com/crazypeace/gh-proxy/raw/master/perl-pe-para )" ) 一键WARP开IPv4出站 修改前 bash <(curl -L  https://raw.githubusercontent.com/P3TERX/warp.sh/main/warp.sh ) 4 修改后 bash <(curl -L  https://ghproxy.crazypeace.workers.dev/ https://raw.githubusercontent.com/P3TERX/warp.sh/main/warp.sh   | perl -pe "$(curl -L  https://ghproxy.crazypeace.workers.dev/ https://github.com/crazypeace/gh-proxy/raw/master/perl-pe-para )" ) 4  

Free.vps.vc 访问GitHub资源出错 用GithubProxy代理 用sed修改脚本内容

图片
问题 Free.vps.vc 访问GitHub资源出错 --update sed不支持非贪婪匹配 改用perl 修改后 bash <(curl -L  https://github.crazypeace.workers.dev/ https://github.com/crazypeace/v2ray_wss/raw/main/install.sh   | perl -pe "$(curl -L  https://github.crazypeace.workers.dev/ https://github.com/crazypeace/gh-proxy/raw/master/perl-pe-para )" ) 解决思路 用 GitHub Proxy 代理 source:  https://github.com/hunshcn/gh-proxy 要么fork一份脚本,自己修改添加gh-proxy,如下文教程 如何设置自定义gh-proxy参数使用我的warp脚本 要么就把脚本下载到本地,然后修改脚本。有手搓和sed命令替换两条路。 手搓方法 1. 自己搭 或者 使用现成的 GitHub Proxy . 以  https://github.crazypeace.workers.dev/  为例 2. 在你的 GitHub 资源 url 的前面加上 GitHub Proxy 的 url  如: bash <(curl -L https://github.com/crazypeace/v2ray_wss/raw/main/install.sh) 修改为 bash <(curl -L  https://github.crazypeace.workers.dev/ https://github.com/crazypeace/v2ray_wss/raw/main/install.sh) 3. 如果你的资源是一个脚本,而这个脚本里面访问了GitHub资源 3.1 那么你可以先 wget 下来 wget  https://github.crazypeace.workers.dev/ https://github.com/crazypeace/v2ray_wss/raw/main/i...

Shell脚本支持同时使用多个参数 shift移动参数列表

图片
在前面的修改中,我们的脚本已经支持了gh-proxy参数。 但是warp脚本还支持比如 4, 6, s5 等参数比较方便使用,不用在菜单里选了。 所以我们的脚本能支持多个参数就好了。 这里就要用到 shift 来移动参数列表

Shell脚本支持设置gh-proxy参数 解决raw.githubusercontents.com command not found问题

图片
最近在hax woiden上访问带S的raw.githubusercontent s .com脚本会报错command not found 原因是raw.githubusercontent s .com并非官方服务,现在这个服务临时关闭了。 使用自建 gh-proxy 可以解决访问脚本的问题,但是脚本里面再访问github资源怎么办呢? 所以脚本需要支持带gh-proxy的参数,在脚本里面访问github资源的时候前面加上gh-proxy

使用Cloudflare Worker自建GitHub Proxy代理 解决raw.githubusercontents.com command not found问题

图片
最近在hax woiden上访问带S的raw.githubusercontent s .com脚本会报错command not found 现象如下: /dev/fd/63: line 1: $'\347\275\221\347\253\231\347\273\264\346\212\244\343\200\202': command not found /dev/fd/63: line 1: 网站维护。: command not found 查了一下,这个服务并不是GitHub官方的,目前暂停了。 消息源: https://github.com/7ednet/yard/discussions/11 所以我们需要搭一个自己的GitHub代理。

The Hot3 in Last 30 Days

酒馆SillyTavern 玩英文角色卡 也能以中文输出 设置世界书Lorebooks

搭 Docker版 Sub-Store订阅转换专家 带 http-meta 实现 集合订阅 测延迟 排序 筛选 生成新订阅 定时任务上传Gist